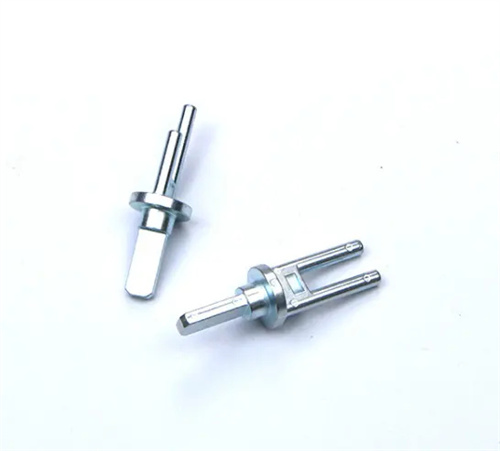
Turning eccentric workpieces with two centers
Using two centers to turn eccentric workpieces is a commonly used eccentric processing method in mechanical processing. It is particularly suitable for eccentric shaft parts with long lengths and small eccentricity. The characteristic of eccentric workpieces is that the axis of the part does not coincide with the reference axis and there is a certain eccentricity, such as crankshafts and camshafts. Using two centers to clamp eccentric workpieces can ensure the stability and rotation accuracy of the workpiece during the processing, which is conducive to improving the accuracy of the eccentricity and the surface quality of the parts. The core of this method is to reasonably set the position of the center so that the eccentric axis of the workpiece coincides with the rotation axis of the lathe spindle, thereby realizing the turning of the eccentric outer circle.
Before using two centers to turn eccentric workpieces, careful preparation is required. First, center holes must be drilled on both end faces of the workpiece. However, the position of the center hole is not located at the geometric center of the workpiece, but is determined according to the required eccentricity. For example, if the diameter of the workpiece is 50 mm and the required eccentricity is 5 mm, the center hole should deviate from the geometric center by 5 mm. When drilling, a marking tool should be used to accurately mark the position of the eccentric center on the end face, and a sample punch should be made to ensure the position accuracy of the center hole. In addition, suitable centers and heart-shaped chucks must be prepared. The accuracy of the center directly affects the rotation accuracy of the workpiece, so a dead center or live center with higher precision should be selected; the heart-shaped chuck is used to drive the workpiece to rotate, and its clamping part should fit closely with the workpiece to avoid slipping during processing.
When clamping the workpiece, the workpiece with eccentric center holes at both ends needs to be installed between the front and rear centers, and the workpiece is connected to the spindle through a heart-shaped chuck. Adjust the position of the front and rear centers so that the eccentric axis of the workpiece coincides with the axis of rotation of the spindle. This is a key step to ensure machining accuracy. During adjustment, you can use a dial indicator for calibration. Fix the dial indicator on the tool holder so that its probe contacts the outer circle of the workpiece, then slowly rotate the spindle and observe the changes in the dial indicator reading. If the difference between the maximum and minimum values of the dial indicator reading is equal to twice the eccentricity, it means that the eccentric axis of the workpiece has coincided with the axis of rotation of the spindle; if the reading does not meet the requirements, the position of the center needs to be adjusted until the requirements are met. After clamping is completed, the stability of the workpiece must also be checked to ensure that it will not loosen or shift during the cutting process.
When turning eccentric workpieces, the selection of cutting parameters and tool geometry have a significant impact on machining quality. Because eccentric workpieces generate significant centrifugal force during rotation, causing workpiece vibration, a lower spindle speed should be selected—generally 50% to 70% of the speed used for machining ordinary shaft parts—to minimize the impact of vibration on machining quality. The feed rate and back-cut should also be appropriately reduced. The feed rate is typically 0.1 to 0.3 mm/rev, and the back-cut should be applied in multiple passes based on the machining allowance, with each pass not exceeding 1 to 2 mm. For the tool, a rigid carbide turning tool should be selected with a lead angle of 90° to 95° to reduce radial cutting forces and prevent workpiece bending and deformation. Furthermore, the rake and relief angles should be appropriately increased to enhance tool sharpness and reduce cutting forces and heat.
During machining, the following points require attention to ensure machining quality. First, rough turning should be performed to remove most of the machining allowance. After rough turning, the actual eccentricity should be measured. If any error exists, it can be corrected by adjusting the position of the center. During finish turning, use lower cutting parameters and make ample use of cooling lubricants to reduce cutting temperatures, minimize tool wear, and improve surface quality. Second, monitor workpiece vibration at all times. If excessive vibration occurs, immediately stop the machine for inspection, adjust the spindle speed, or re-clamp the workpiece. Furthermore, after machining, the eccentricity must be accurately measured. Commonly used measuring tools include dial indicators, vernier calipers, and eccentricity measuring instruments. For eccentric workpieces requiring higher precision, straightening is required to eliminate bending deformation caused during machining. With proper clamping, correct parameter selection, and meticulous operation, eccentric workpieces machined with two centers can meet high precision requirements and are suitable for machining a variety of mechanical parts.
